Wild Green Zuma in Honeycomb: The World Beyond — Habitat & Scanning Tips
Where to find the timid Wild Green Zuma in Honeycomb: The World Beyond — its Valley habitat, axolotl looks, why scans take patience, and its crafting secretion.
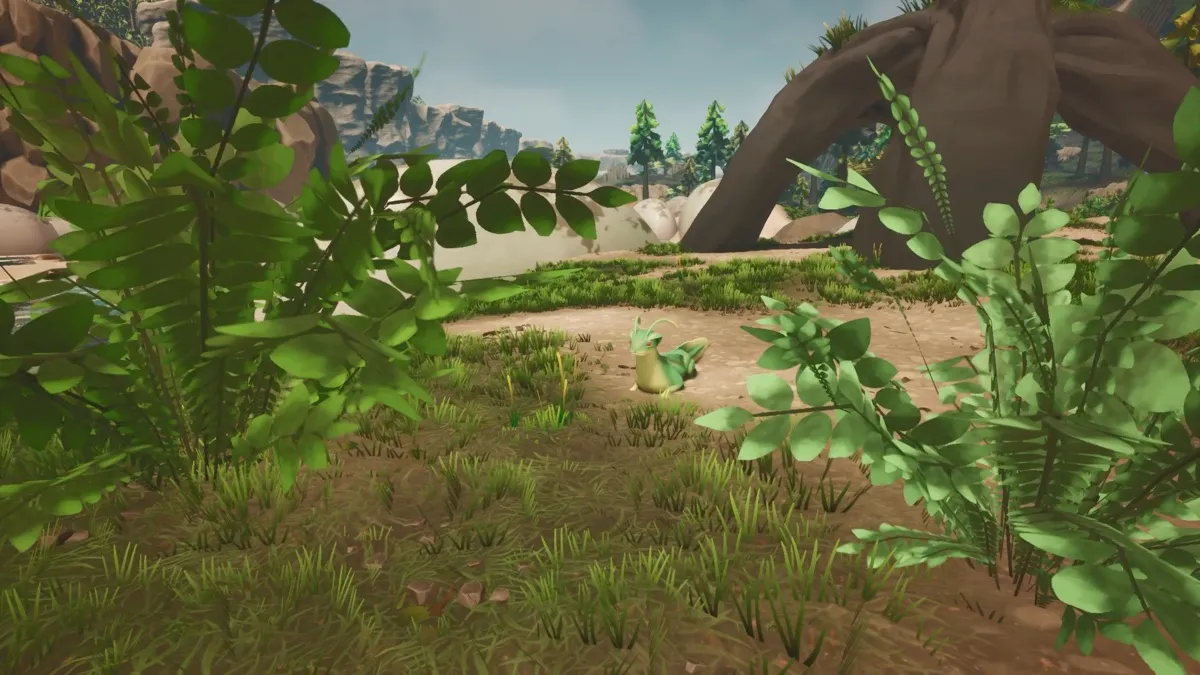
Where can you find the Wild Green Zuma?
The Wild Green Zuma lives in the damp, cooler stretches of the Valley, close to open water. The Valley is Sota7’s first zone — low-risk terrain shaped by branching channels, shallow pools, and marshlands — so you will meet this amphibian early, usually while working the waterways. For the zone’s overall layout, see the Sota7 zones guide; for how creature scanning drives your research, start at the creatures field guide hub.
What makes the Zuma tricky is not danger but patience. It prefers to stay hidden beneath rocks and vegetation, so walk the water’s edge slowly and watch cover rather than open ground.
What does the Wild Green Zuma look like?
Three features separate it from everything else you will scan in the Valley:
- Vibrant green coloration — bright enough to spot once you know the shape.
- Red-sclera eyes — the outer ring of the eye is red, which reads clearly at scanning distance.
- Twin antennae-like appendages — two sensory stalks on the head.
The overall silhouette carries more than a passing resemblance to an axolotl, and that comparison is the fastest way to confirm you have the right creature before investing time in a stalk.
Why does scanning one take so long?
Because the Wild Green Zuma is timid and easily spooked. According to the official SOTA7 Field Survey Log #2 (The Valley), getting a clean scan takes patience — the boldest-looking animal in the zone is also the shyest. Practical habits that help:
- Approach the water slowly and stop often; let the Zuma re-emerge on its own.
- Scan from the edge of its cover instead of crowding the rock it hides under.
- If it bolts, back off and try another stretch of water rather than chasing it.
The same observational discipline you build here carries into the Headlands, where species like the Imperial Strider flee even faster.
What is the Zuma’s crafting value?
The Zuma produces a viscous secretion that has real crafting value, which is what makes the scanning effort worthwhile. Collect it whenever you secure a clean encounter — early-game crafting lines in Honeycomb draw on animal materials like this one, alongside the wool from Lucuma Camilla and the feathers from Gum Nibis.
How does it fit into the Valley ecosystem?
The Valley leans curious rather than aggressive, and the Zuma is the zone’s textbook example: harmless, wary, and rewarding to study. It is one of the first creatures where the game teaches you that observation beats pursuit — the same lesson that keeps you alive around the zone’s one genuine hazard, the Scorchweaver. Scan everything, log the Zuma early, and the laboratory options it unlocks feed directly into the crossbreeding work that defines the late game.
Gallery
Related Articles
More from the field survey
guides
Honeycomb: The World Beyond Composter Guide: Biomass from Plant Matter
The Composter in Honeycomb: The World Beyond — how the Second Life quest's biomass loop works, what to feed it, and what the biomass is for.
guides
Honeycomb: The World Beyond Hoverboard Guide: Unlock, Controls & Durability
The hoverboard in Honeycomb: The World Beyond — how to unlock it, how it handles on Sota7, and how its durability scales with difficulty.
guides
Honeycomb: The World Beyond Storage & Rotting Guide: Containers & Fridges
How food rotting works in Honeycomb: The World Beyond — containers slow decay to 15%, powered fridges stop it entirely, and difficulty scales spoilage.
Was this helpful?
Thanks for the feedback!